
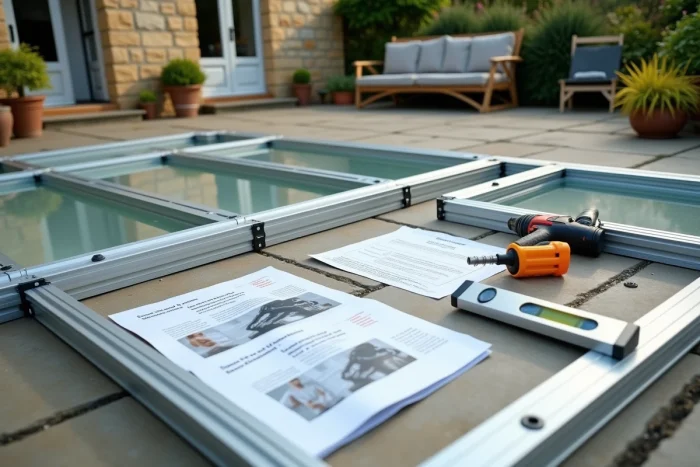
A Brico Dépôt kit veranda rests on pre-drilled aluminum profiles, polycarbonate or laminated glass roofing panels, and calibrated screws for a seamless assembly. Before taking out the screwdriver, the success of the assembly hinges on two points that the instructions barely touch on: the nature of the receiving slab and the compatibility of the fasteners with the actual substrate.
Anchoring on existing slab: the constraint that guides ignore
Most tutorials assume that the slab is bare, homogeneous concrete, ready to receive mechanical anchors. In practice, recent outdoor slabs often include an insulating layer (insulated slab with integrated insulation, insulating leveling). The anchors must reach the structural concrete, not the insulation.
Read also : Discover how to easily watch movies and series for free streaming
The instructions for several Brico Dépôt models (notably the VERALI range) specify that one must check the load-bearing capacity and anchoring in the supporting concrete. On an insulated slab, this means drilling deeper, sometimes creating a peripheral reinforced concrete chain to distribute the structural loads.
We recommend probing the slab before placing any orders. A simple hammer drill with a long bit allows you to measure the thickness of the non-load-bearing layer. If it exceeds a few centimeters, plan for long-stem chemical anchors rather than standard expansion anchors. Brico Dépôt also offers chemical sealing kits compatible with its verandas, a logic of ecosystem that simplifies supply.
Read also : How to Select a Reliable Real Estate Professional: Essential Tips and Advice
For those wishing to assemble a Brico Dépôt kit veranda on an old slab, a laser level check remains essential. A gap of a few millimeters along the length of the threshold is enough to compromise the sealing of the glazing joints.
Compatibility of fasteners and Brico Dépôt ecosystem
For several years, Brico Dépôt has structured its ranges around a principle of cross-compatibility: veranda, mounting plates, stainless steel screws, chemical anchors, and tools come from the same catalog. The interest is twofold.
- The plates are pre-sized for the aluminum profiles of the home kits, eliminating the risk of play between the base and the bottom rail.
- The supplied screws (generally stainless steel A2) resist corrosion in outdoor environments without additional treatment, provided they are not mixed with galvanized steel screws (risk of galvanic corrosion).
- The referenced chemical anchors are tested for the tensile and shear loads generated by the profiles under wind, avoiding blind sizing.
Do not substitute the kit’s screws with generic materials. A bolt of the same diameter but of lower strength class can give way under a gust. We regularly observe this type of error on DIY projects.
Polycarbonate roofing or glazing: impact on the assembly sequence
The choice of roofing material alters the order of operations. With hollow polycarbonate panels, installation occurs after the complete assembly of the frame: the panels slide into the edge profiles and snap in place. Polycarbonate forgives small measurement inaccuracies due to its flexibility.
A laminated glass or double-glazing roof imposes an inverse logic. Each glazed panel must be installed as the frame progresses, because the weight of the glass stabilizes the structure and handling large sheets above a closed frame becomes dangerous without a hoist.
Minimum slope and water drainage
The slope of the roof conditions long-term waterproofing. Brico Dépôt kits generally provide for a slope integrated into the design of the aluminum rafters. Check that the actual slope, once the structure is placed on your slab, meets the minimum indicated in the instructions.
A slope defect causes water to stagnate on the polycarbonate, which eventually turns green and loses its transparency. On glazing, stagnant water deposits limescale that requires acid cleaning. In both cases, connect the provided gutter to an existing drain or rainwater collector.
Waterproofing at the wall: silicone sealant is not enough
The connection between the top beam of the veranda and the house wall is the recurring weak point of kit assemblies. A simple bead of silicone applied between the profile and the coating does not withstand the thermal expansion cycles of aluminum.
The reliable technical solution is a coated aluminum flashing fixed to the wall with anchors, with a polyurethane sealant in the bottom of the groove and an overlap of at least a few centimeters on the roofing. Some Brico Dépôt kits include this flashing, others do not. Check the exact contents of the package before assembly.
Recommended sequence for wall sealing
- Mark the flashing line with a chalk line, respecting the roof slope.
- Create a groove with a grinder in the coating (or in the brick joint depending on the support) to embed the flashing.
- Install the flashing with PU sealant in the bottom of the groove, then fix it mechanically every 30 to 40 cm approximately.
- Apply an acrylic sealant on the upper lip of the flashing to block capillary infiltration.
This step adds one to two hours to the project, but it conditions the durability of the whole. A well-flashed kit veranda remains watertight much longer than a simply silicone-mounted one.
The final check before enjoying the veranda: retighten all the bolts after a few days. Aluminum works slightly due to temperature variations, and a slight retightening to the recommended torque ensures the rigidity of the frame in the long term.